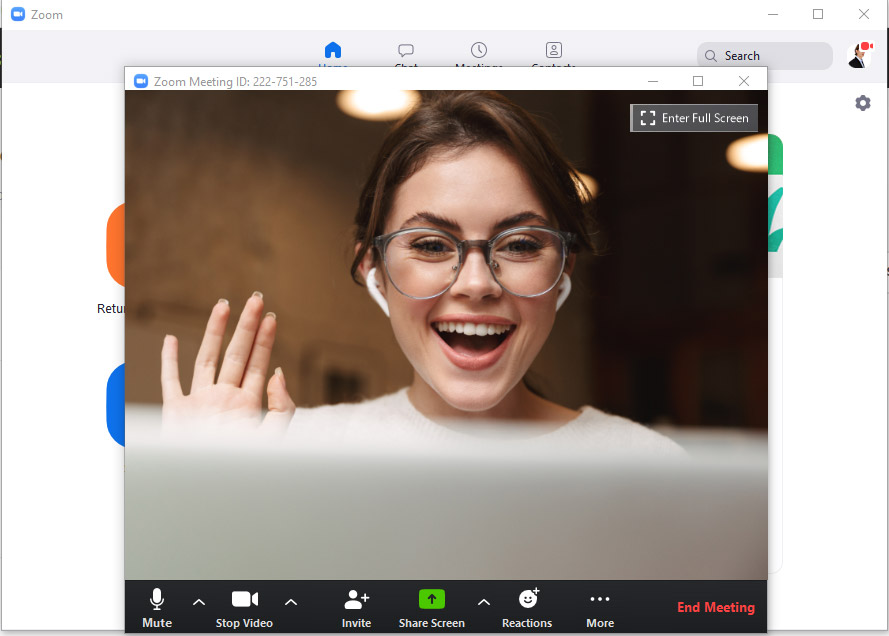
Zoom Integration
Zoom enables teachers, coaches, and trainers to conduct live, face-to-face learning with groups of learners simultaneously.
Zoom enables teachers, coaches, and trainers to conduct live, face-to-face learning with groups of learners simultaneously.
These instructions guide you through integrating Open eLMS with Zoom's video conferencing platform.
Step 1: Create your first Zoom teaching session
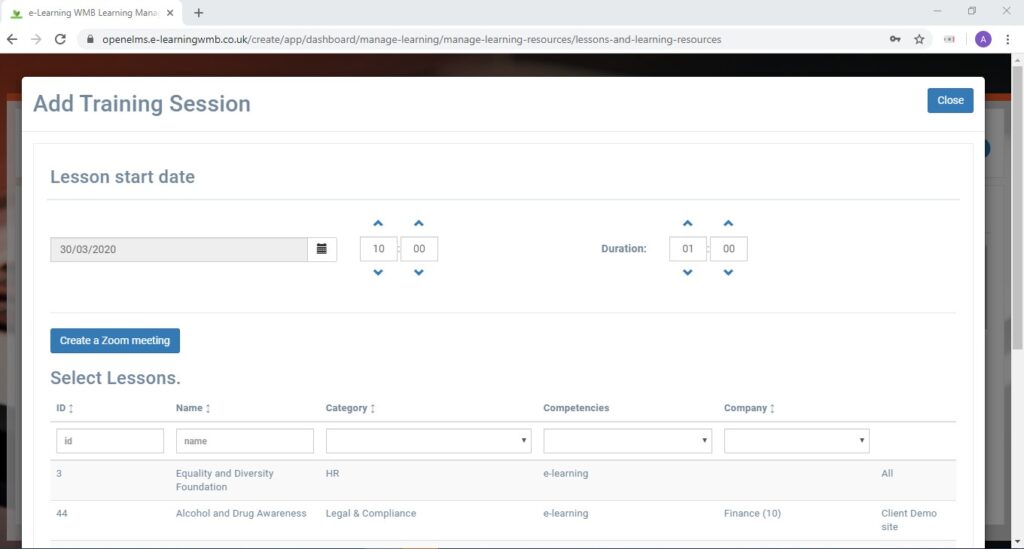
Administrators and teachers can create Zoom meetings when adding sessions to their learning schedule.
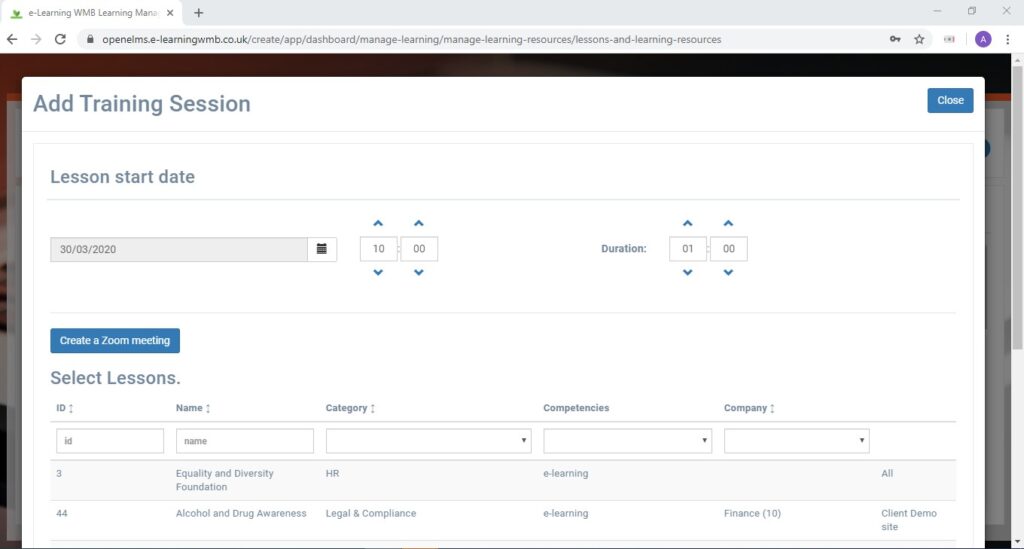
Clicking the [Create a Zoom meeting] button will initiate the Zoom installation if it is your first time using it.
Step 2: Create your Zoom account
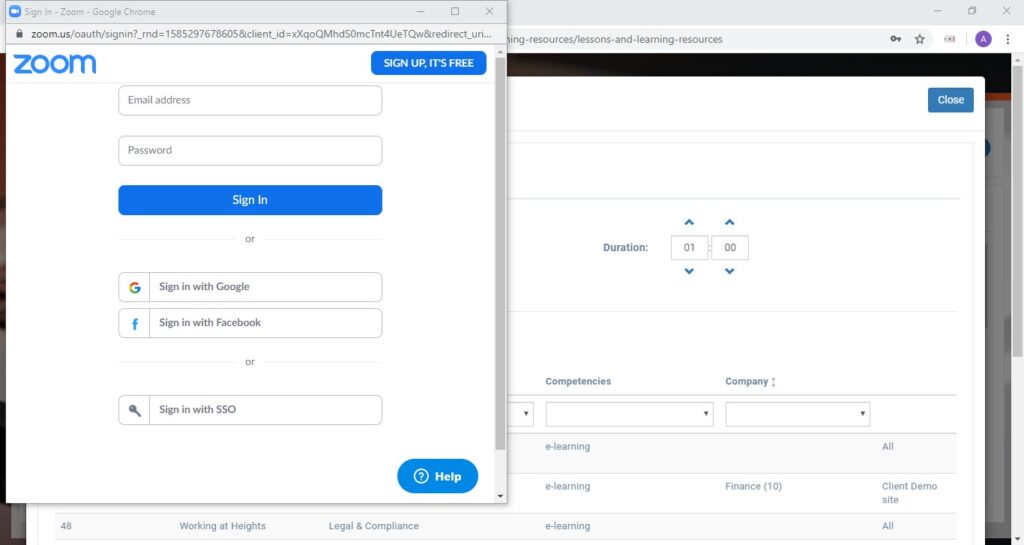
If you already have an account, the Zoom meeting will be created automatically. If you are not signed in, you will be prompted to do so.
If you do not have an account, select the [Sign up, it's Free] button in the top right corner of the screen.
Step 3: Cookies
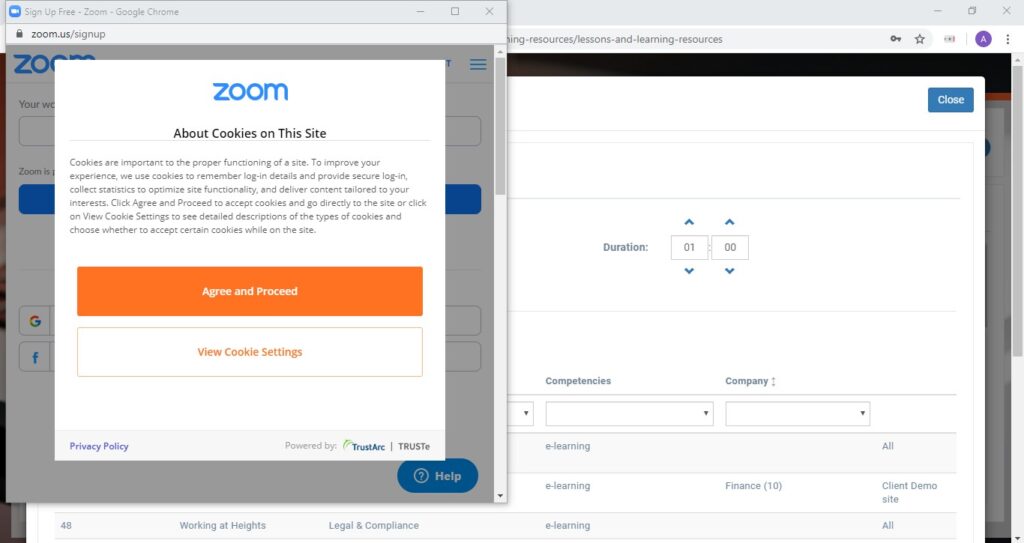
Review the cookie policy and select [Agree and Proceed] to continue.
Step 4: Sign Up Options
You can sign up using your Google or Facebook accounts to automatically sync your credentials.
Alternatively, select [Agree and Proceed] to sign in manually.
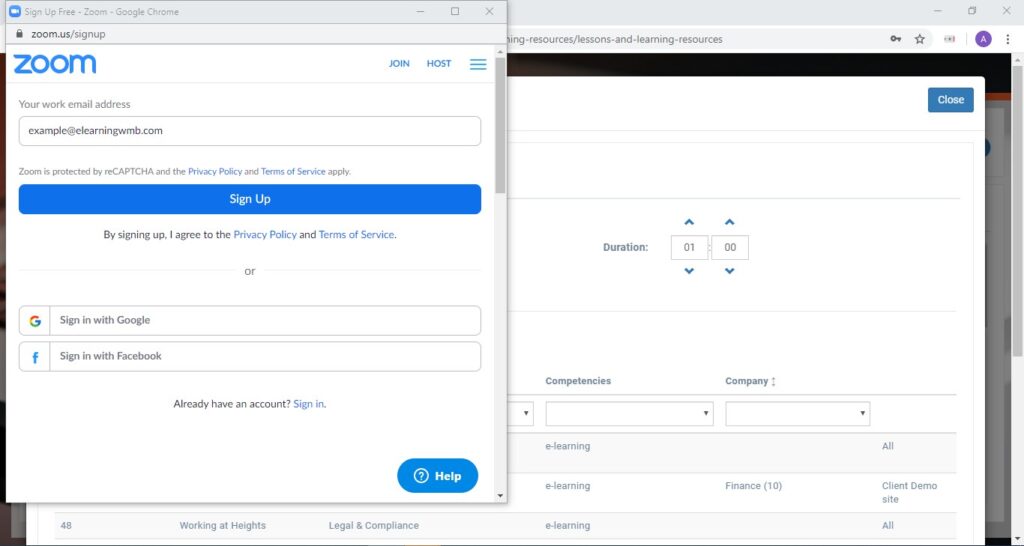
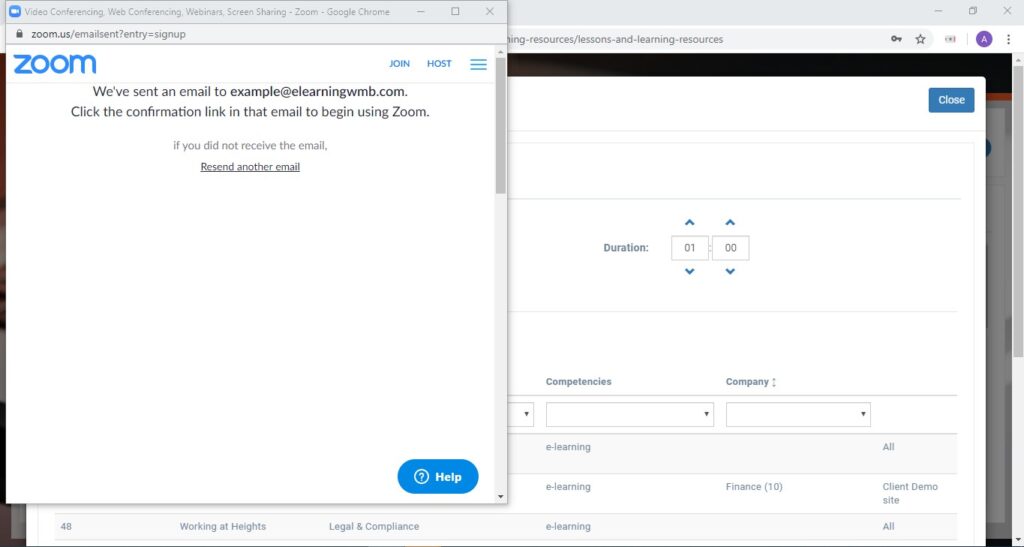
Step 5: Confirmation Email Sent
A confirmation email will be sent to your registered address.
Please check your inbox to continue the process.
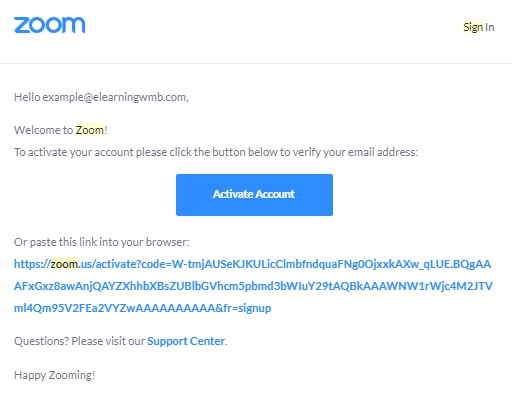
Step 6: Activate Account
Click the [Activate Account] link within your confirmation email.
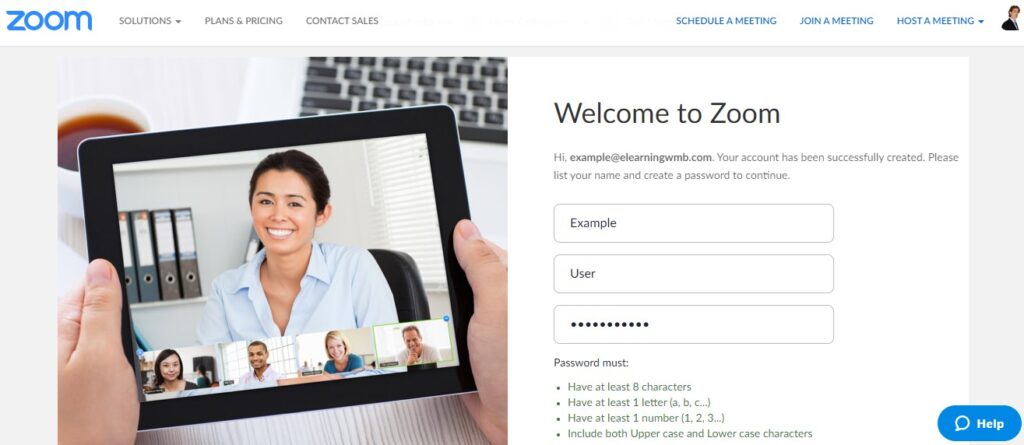
Step 7: Sign in to Zoom
Sign in and set your password following the on-screen instructions.
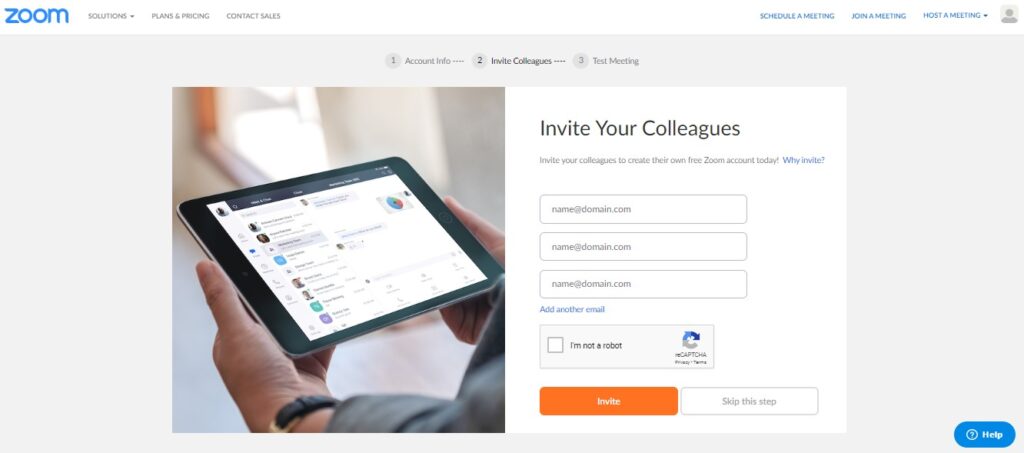
Step 8: Invite Colleagues
You can skip this step; students are automatically invited when they access the lesson via Open eLMS.
Refer to the student instructions for more details.
Step 9: Test your meeting
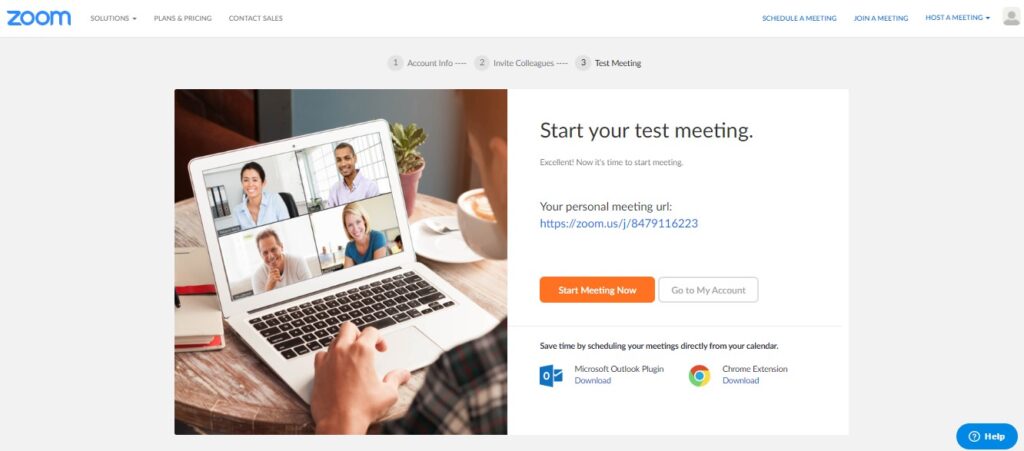
Test your setup by clicking the [Start Meeting Now] button.
Step 10: Test Audio
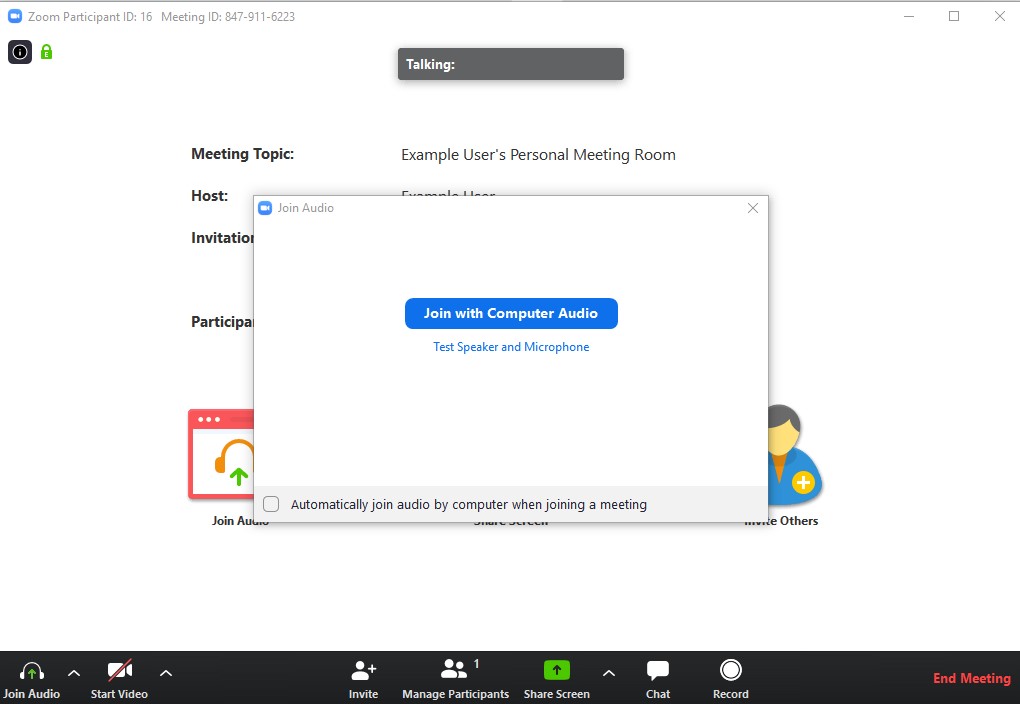
We recommend testing your speaker and microphone by clicking the [Speaker and Microphone] link.
Once confirmed, you are ready to start your first lesson. You can now return to the lesson interface.
Step 11: Authorise the App
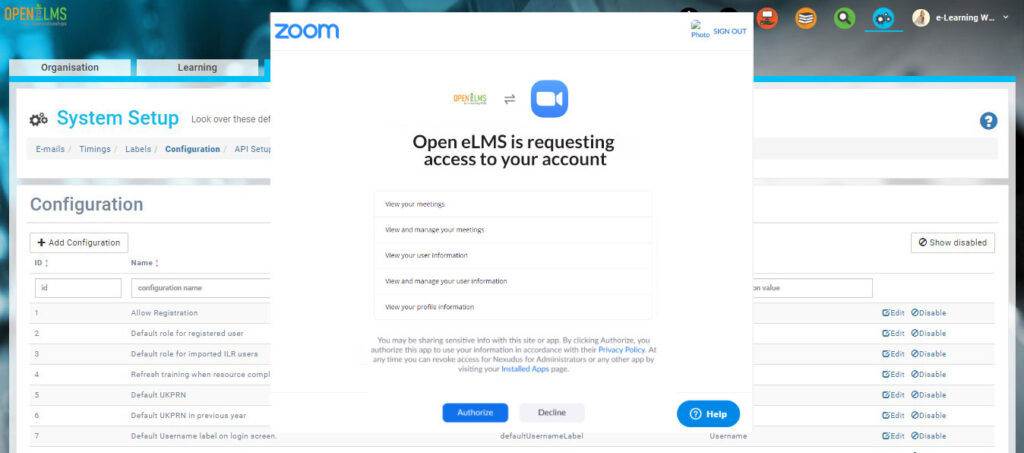
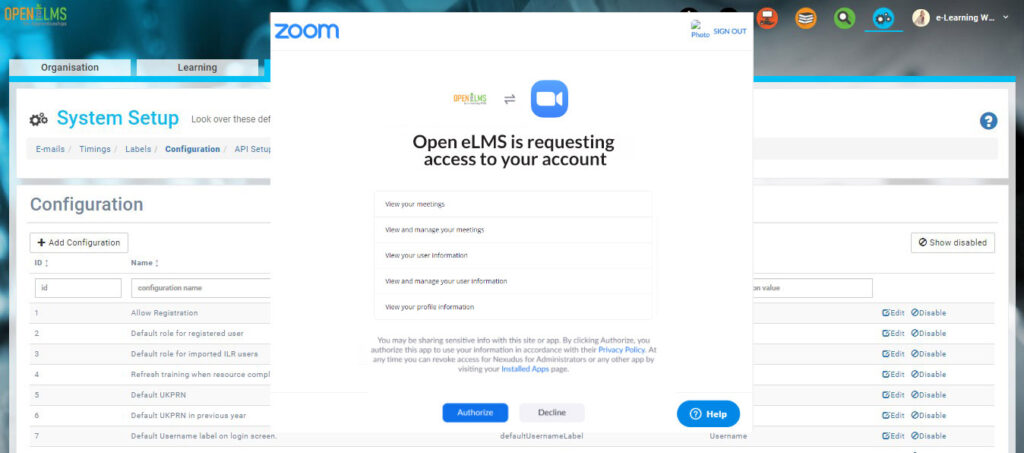
Allow Open eLMS to access your Zoom account. The required permissions will be listed on the authorisation screen.
Select [Authorise] to continue.
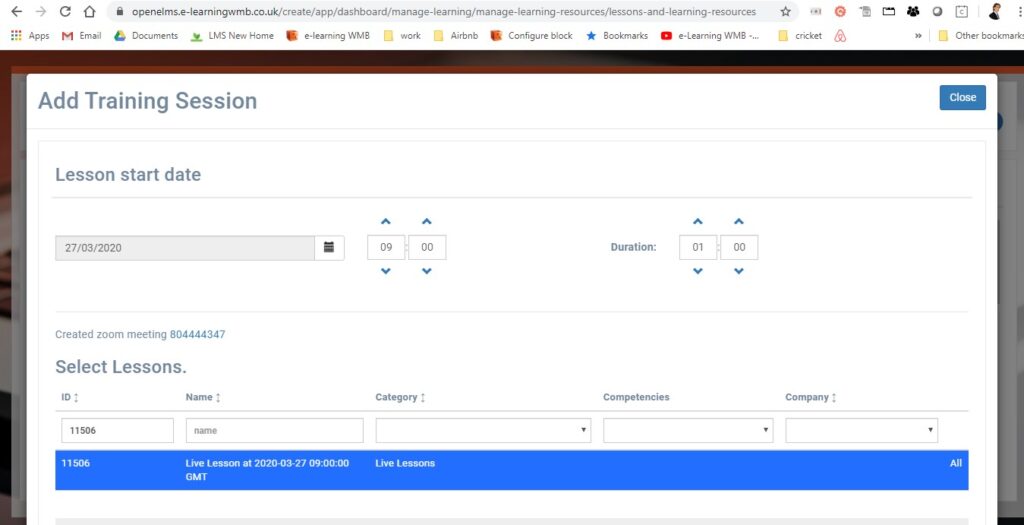
Step 12: The Lesson has been Created
The Zoom lesson is scheduled for your selected date and time.
Once added, both you and your students will receive notifications when the lesson is due.
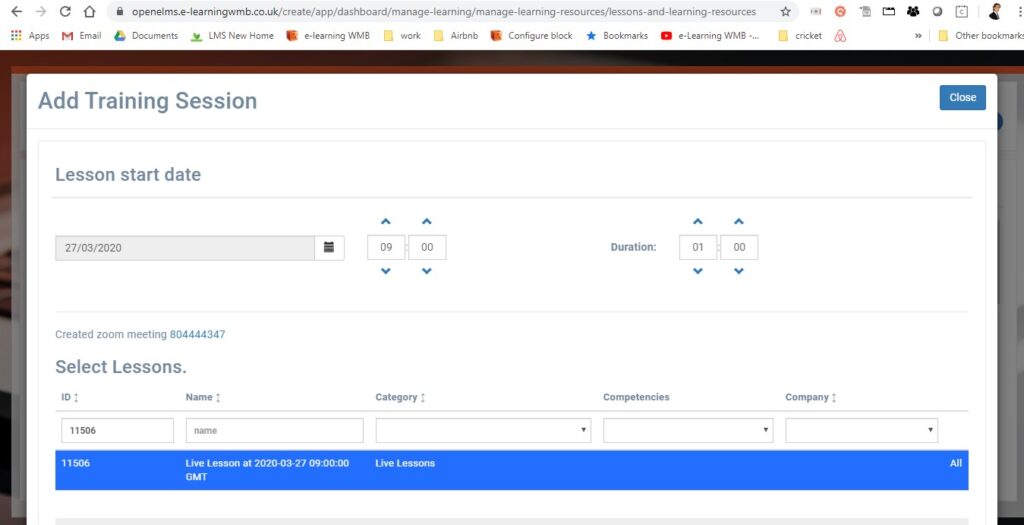
Step 13: Select the Curriculum
Select the relevant areas of the curriculum to which this lesson applies.
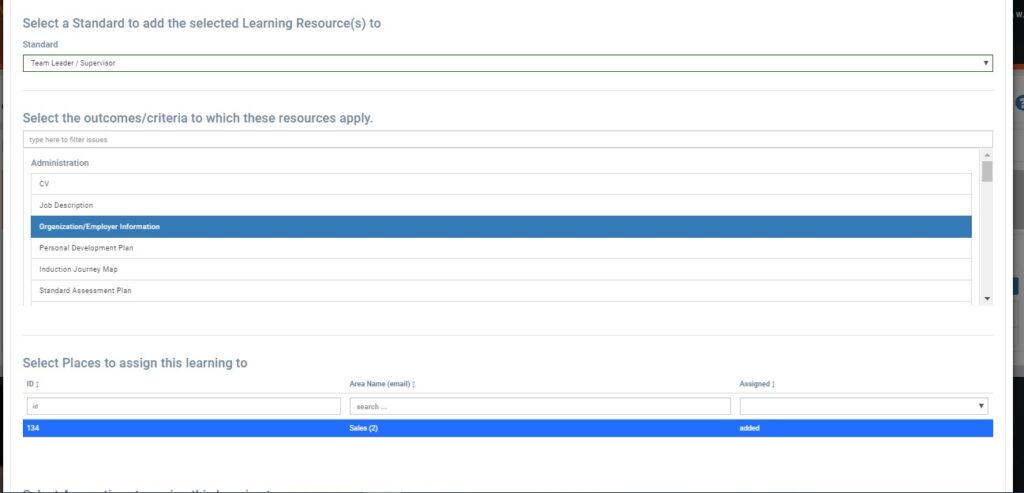
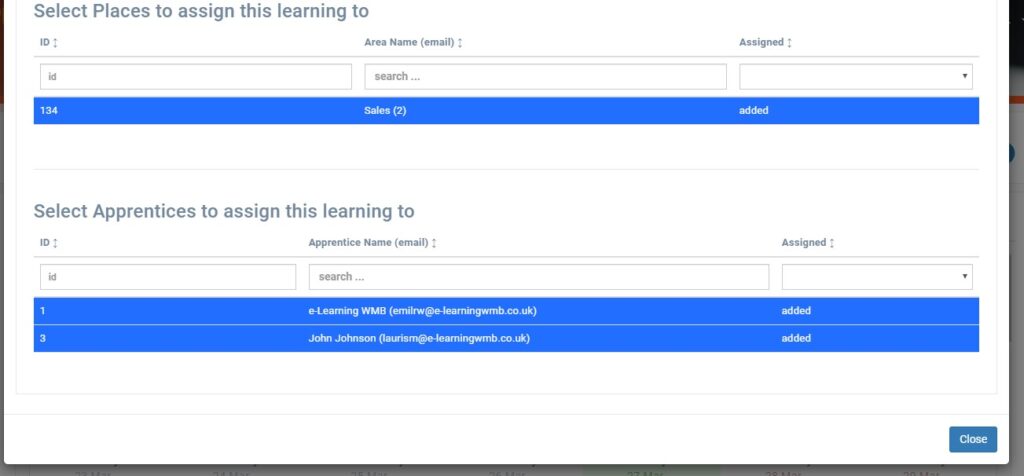
Step 14: Select the Class and Class Members
Step 15: Lesson added to Schedule/Timetable
The lesson is added to your schedule. Populate your week with lesson plans for both remote and face-to-face learning.
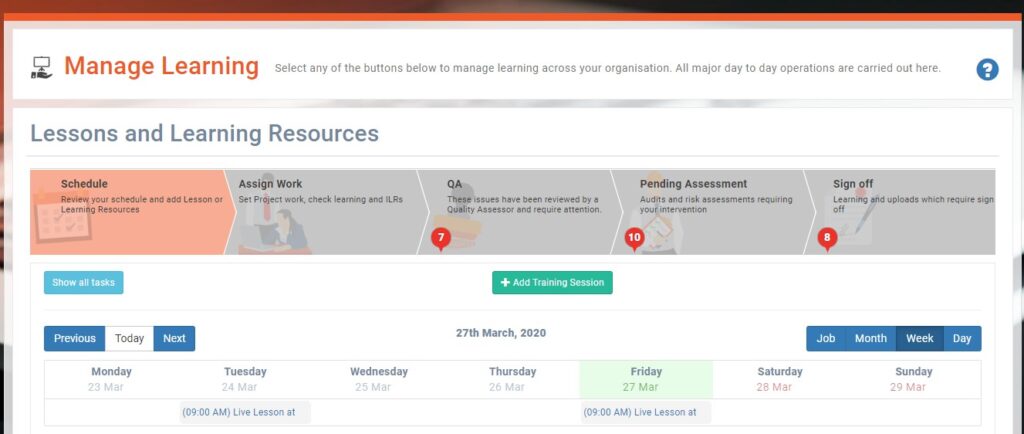
Step 16: Running the Zoom Lesson
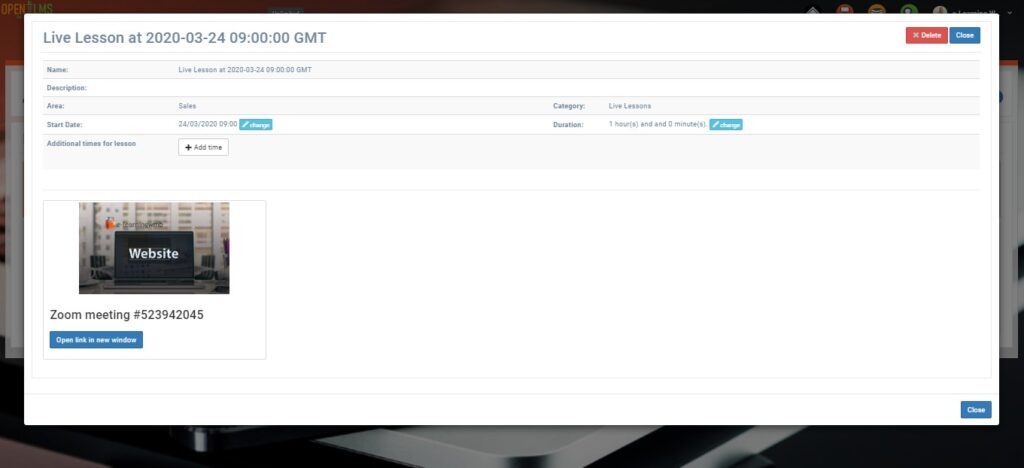
Launch the lesson directly from your schedule. You can manage and edit your scheduled lessons at any time by clicking on them.
Note: These instructions guide students on how to join Zoom meetings created via Open eLMS.
Step 1: Access your lesson
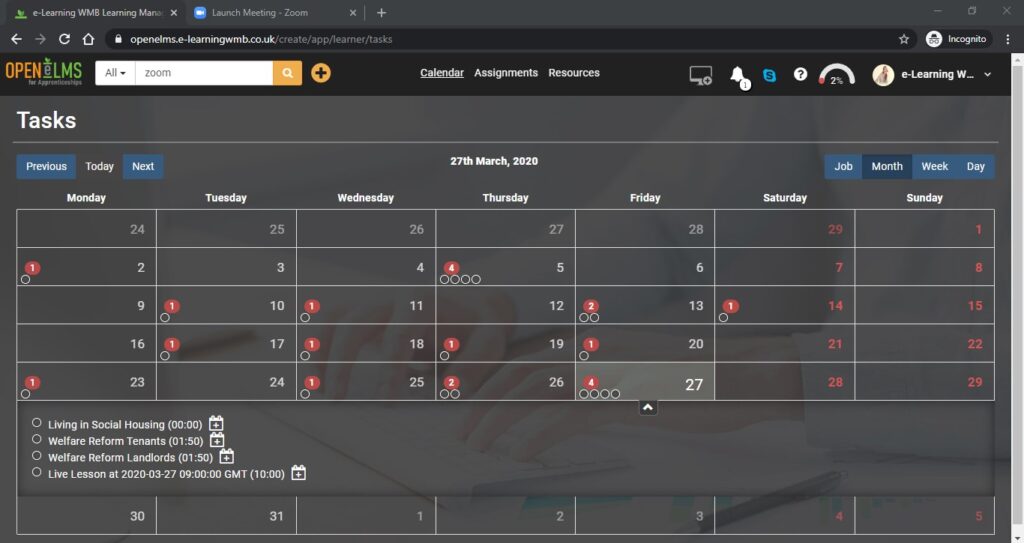
Open eLMS lessons can be accessed via the calendar or an email notification.
Lessons are labelled "Live Lesson" — clicking the link will open the session details.
Step 2: Lesson Details
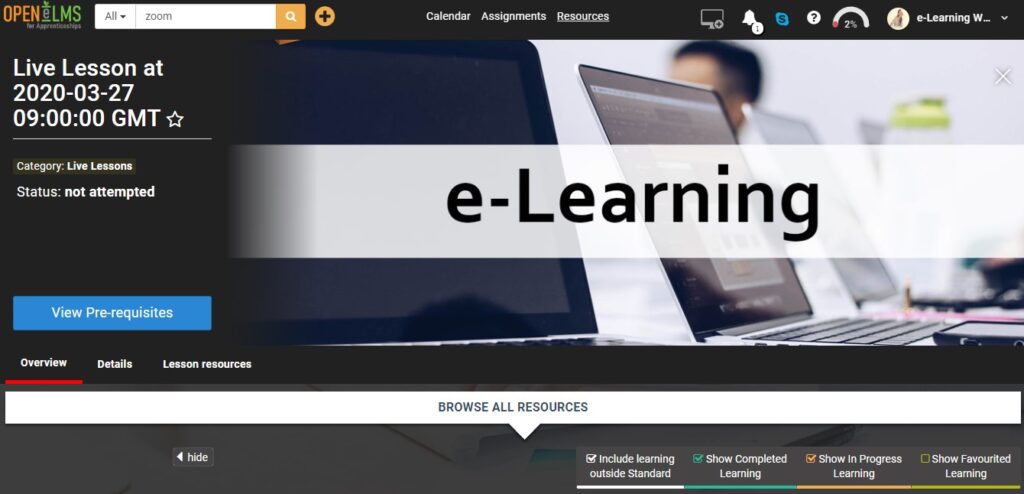
The system may prompt you to view prerequisites. Click the blue button to access the Live Lesson directly.
Step 3: Open the lesson
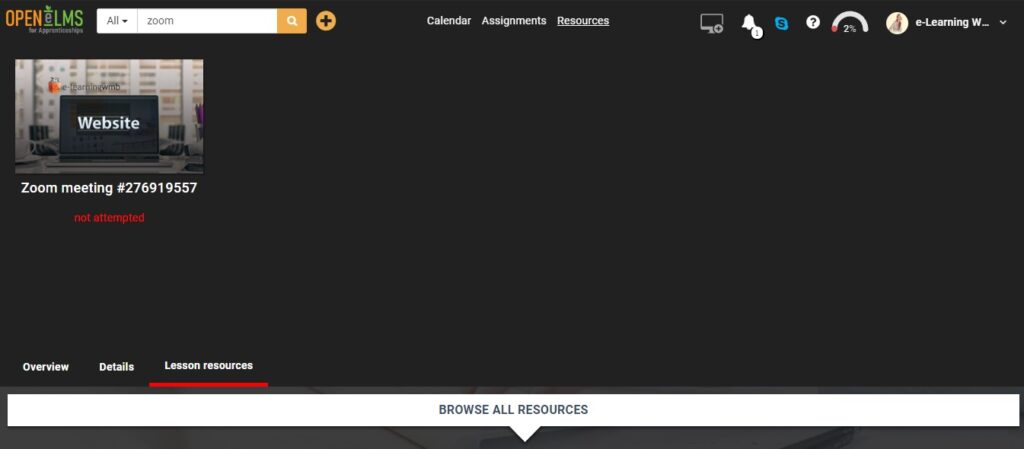
Click the Zoom meeting icon to launch the lesson.
Step 4: Open Zoom
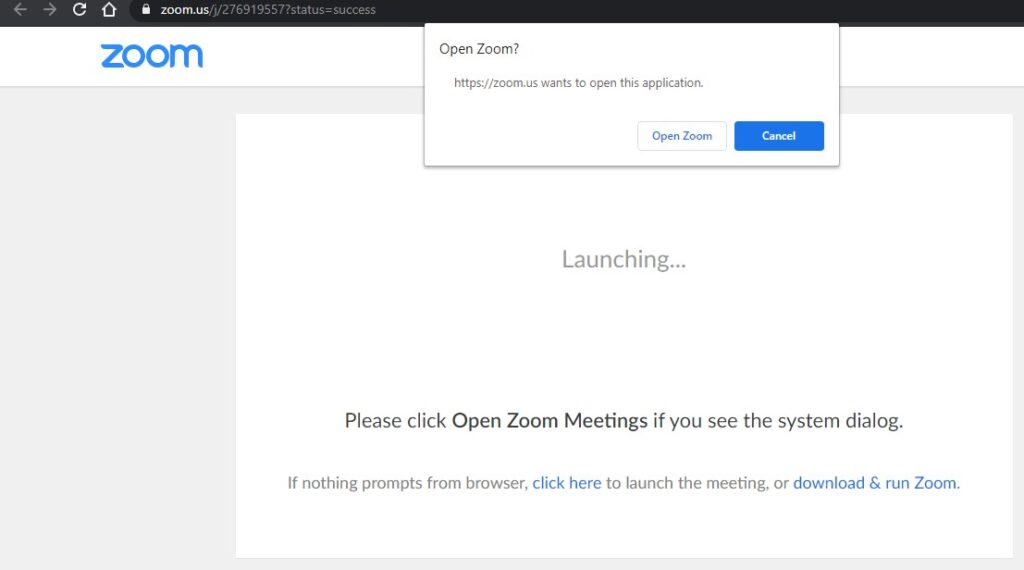
When prompted, select "Open Zoom" to launch the application.
Step 5: Wait for the host
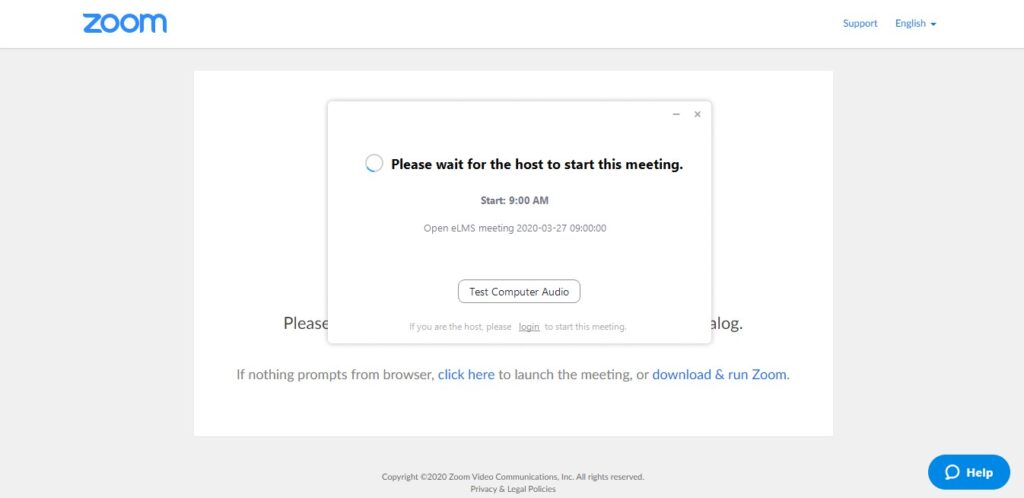
If you join early, you will see a waiting message. The lesson will begin once the teacher or trainer joins the room.
Step 6: Check Audio
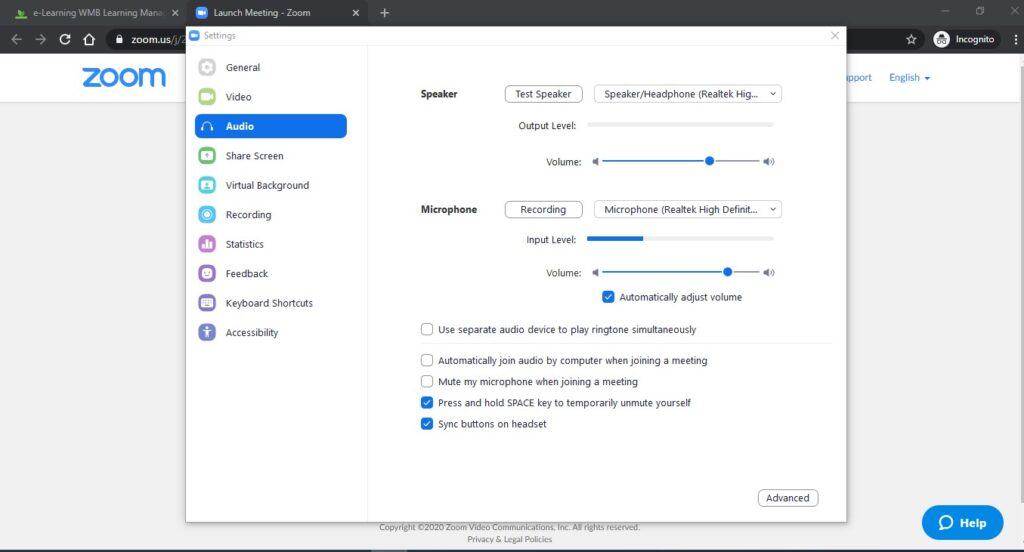
While waiting for the lesson to begin, please check your audio settings.
Click [Test Speaker] to check your sound and [Recording] to test your microphone.
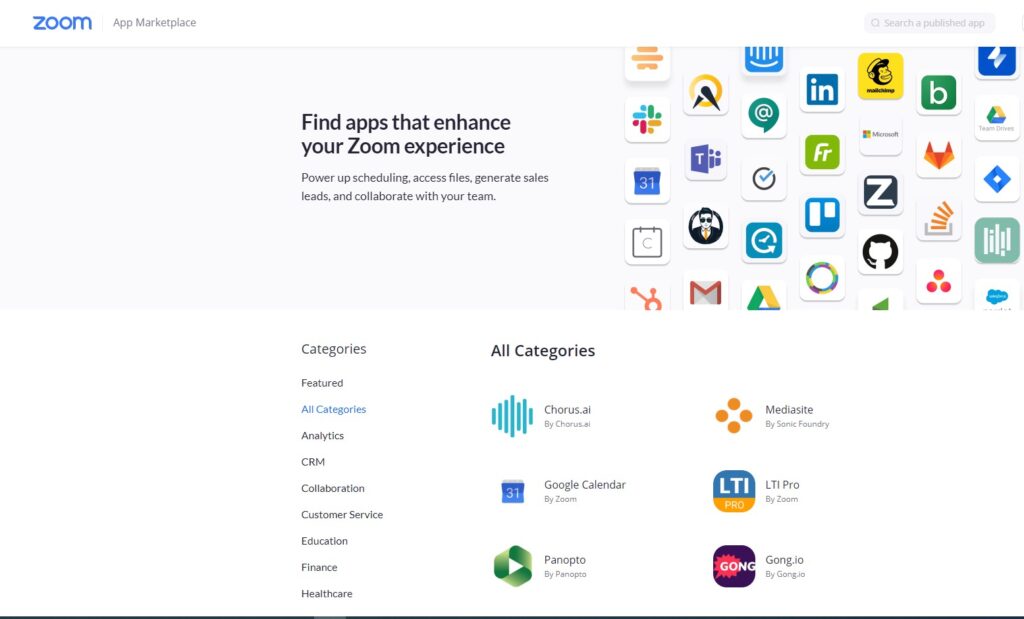
To remove the integration, log in to the Zoom App Marketplace.
Log in to the Zoom App Marketplace, locate the Open eLMS app, and select Uninstall.
The Zoom integration will then be removed from your account.
Step 1: Creating a Lesson Plan
Zoom integration allows teachers and trainers to schedule meetings directly. To begin, navigate to the Timetable tab.
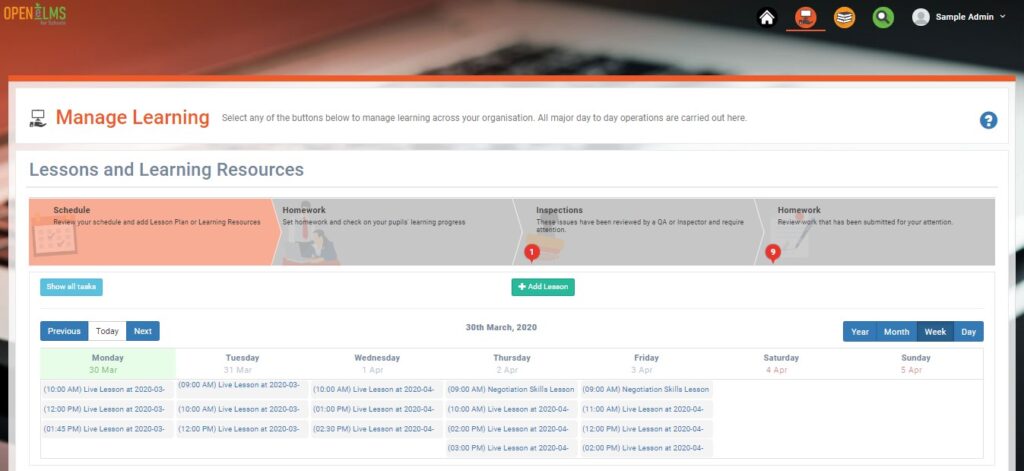
Enter the start date, time, and duration of the lesson.
Once configured, select the [Create a Zoom meeting] button to schedule the session.
If this is your first time accessing Zoom from Open eLMS, you must authorise the app to access your Zoom account. Required permissions will be listed on the screen.
Select [Authorise] to continue.
The lesson will be created, and a meeting ID will be displayed.
Scroll down to link the lesson to the curriculum; this makes locating future recordings easier.
Select the relevant areas of the curriculum to which this lesson applies.
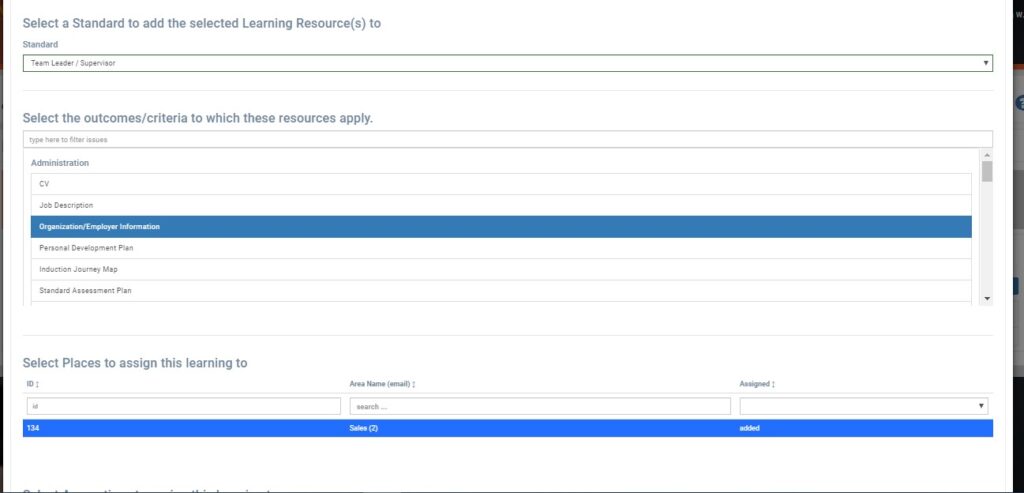
Select the class or department that will attend the lesson. You can also select individual members for targeted learning sessions.
Press [Close] to save the lesson to your schedule.
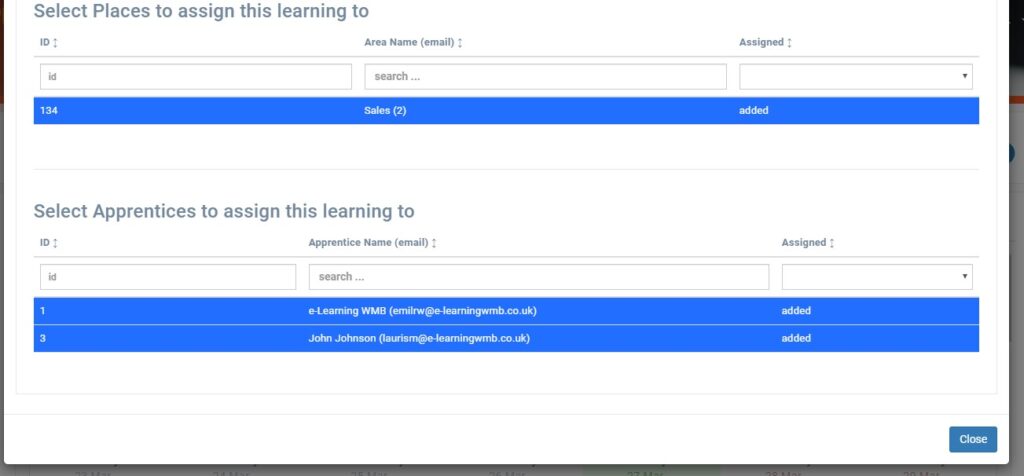
The lesson is now added to your schedule. You can manage your week with remote or face-to-face plans, and edit them at any time by clicking the entry.
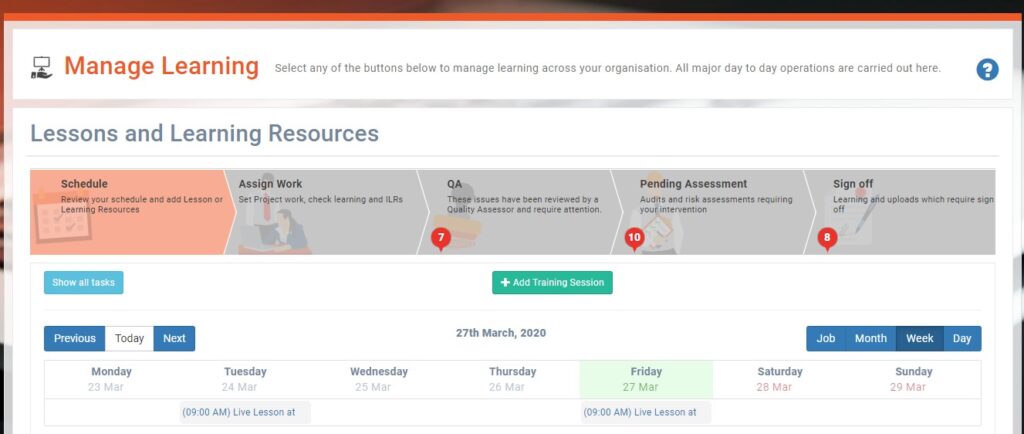
Step 2: Running a Lesson Plan
To start the lesson, click it on your schedule and select [Open link in new window].
You can also schedule additional sessions by clicking the [+Add time] button.
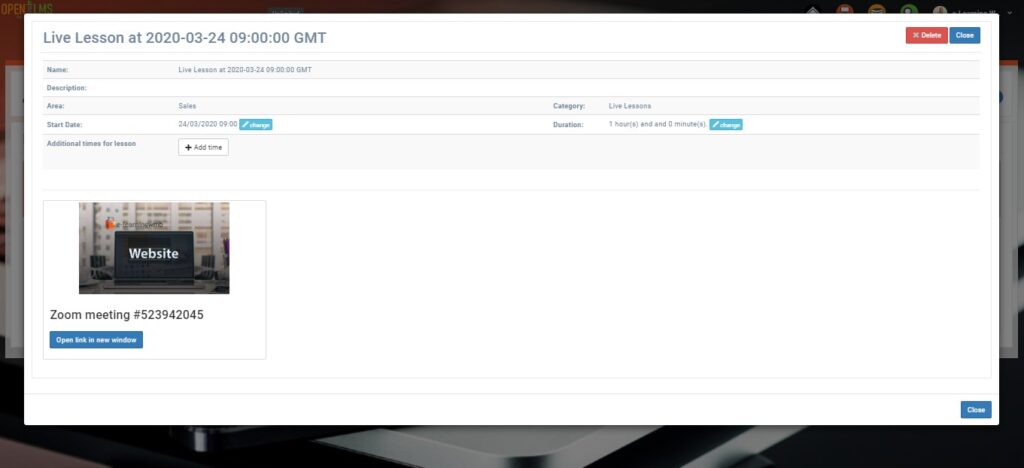
The Zoom window will open with your video active. Learners can join the session at the scheduled time.